
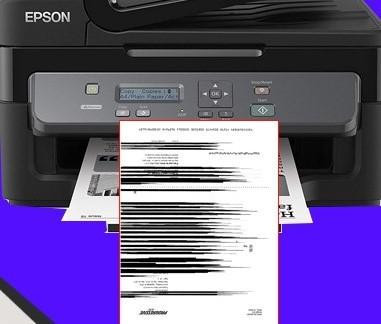
Printers are essential tools in homes and offices alike, but there's nothing more frustrating than when your printed pages come out with horizontal or vertical lines marring the text or images. Whether you're printing a business report or family photos, those pesky lines can ruin an otherwise perfect document. Fortunately, this common issue is usually easy to fix with a few simple troubleshooting steps. In this guide, we’ll walk you through the most effective ways to fix printer printing lines and get your prints looking crisp again.
What Causes Lines in Printed Documents?
Before jumping into the fix, it's helpful to understand why printers develop these line problems in the first place. The most common causes include:
Clogged or dirty printheads
Low or faulty ink cartridges
Misaligned printheads
Paper or hardware issues
Driver/software glitches
Identifying the source of the problem will help you apply the right fix.
Step-by-Step Fixes for Printing Line Issues
1. Run a Printhead Cleaning Cycle
Most printers come with built-in cleaning utilities. Over time, ink can dry and clog the tiny nozzles in your printhead, causing broken lines or streaks.
Go to your printer settings menu (either on the printer itself or via your computer).
Look for “Maintenance” or “Tools.”
Choose “Clean Printhead” or “Printhead Cleaning.”
After the process, print a test page.
If lines persist, repeat the cleaning once or twice. Avoid running the cycle too many times in a row, as it can use up a lot of ink.
2. Check Ink or Toner Levels
Low ink or toner can cause inconsistent prints with missing lines. Check your cartridge levels and replace any that are nearly empty or showing errors. Make sure you're using compatible or original manufacturer cartridges, as third-party options can sometimes cause issues.
3. Manually Clean the Printhead (Inkjet Printers Only)
If automatic cleaning doesn’t work, you might need to do it manually.
Remove the cartridges and gently wipe the printhead with a lint-free cloth dampened with distilled water or isopropyl alcohol.
Let the printhead dry completely before reinserting it.
Run a test print to see if the issue improves.
Note: Always consult your printer's manual before performing manual cleaning, as methods vary by model.
4. Align the Printhead
Misalignment can also cause horizontal or vertical lines. Most printers have a printhead alignment feature:
Navigate to the printer’s maintenance menu.
Select “Align Printhead” or similar.
Follow the on-screen instructions and print an alignment page.
5. Update or Reinstall Printer Drivers
Outdated or corrupted drivers can lead to print quality issues. Visit your printer manufacturer’s website and download the latest driver for your model.
Uninstall the old driver.
Reinstall the updated version.
Restart your computer and test print.
Preventing Future Issues
Once your printer is working again, follow these tips to keep it in top shape:
Print regularly to prevent ink from drying.
Use high-quality paper that matches your printer type.
Turn off your printer properly to keep printheads parked and protected.
Keep it clean and dust-free.
Final Thoughts
Dealing with lines on your printed pages can be annoying, but in most cases, the fix is simple. By cleaning your printhead, checking ink levels, and keeping your printer in good shape, you can restore clear, sharp prints. If you’ve tried all these steps and the problem continues, it might be time to consult a technician or consider replacing the printhead or printer itself.
For more information,
Visit at: https://techdogsonline.com/why-does-my-printer-print-lines-solution-for-clear-print/


Comments
0 comment