
Screen printing continues to gain popularity, with the custom apparel industry expected to grow significantly in the coming years. The global custom T-shirt printing market was valued at USD 5.16 billion in 2024. It is expected to grow at a CAGR of 11.5% from 2025 to 2030. Learning how to make a diy screen-printing machine empowers you to tap into this creative and profitable skill, whether for personal projects or small business ventures.
This hands-on approach lets you customize vibrant designs on clothing, wood, and more without needing professional-grade equipment. A DIY machine is cost-effective, versatile, and perfect for beginners and seasoned creators alike.
By building your screen-printing setup, you unlock endless possibilities for artistic expression and entrepreneurship. Get ready to bring your ideas to life with this simple guide!
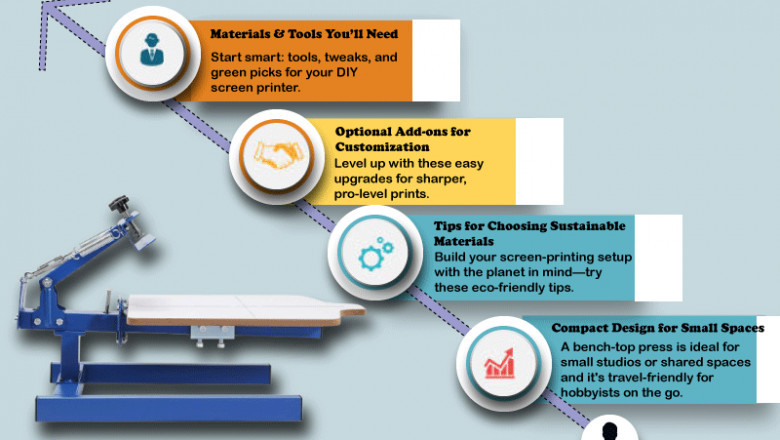
Materials & Tools You’ll Need
If you’re wondering how to make a DIY screen-printing machine, having the right materials and tools is where it all begins. With a proper setup, you’ll be able to create professional-grade designs for personal or business use. Below, we’ve outlined the essentials, optional upgrades, and eco-friendly tips to get you started.
Essential Tools
When learning how to make a DIY screen-printing machine, you’ll need these basic tools to assemble and operate your setup efficiently:
-
Wooden frames – The framework of your screen. Sturdy and well-cut wood ensures durability.
-
Hinge clamps or jiffy hinges – These secure the screen for consistent and accurate printing.
-
Screws, clamps, and screwdriver – Essential for putting all components together and reinforcing stability.
-
Polyester mesh – Acts as the medium through which ink is transferred onto your material.
-
Squeegee and printing ink – Necessary for spreading ink uniformly across the screen for clean results.
These tools are the backbone of your project, ensuring you have a functional and reliable DIY screen-printing machine.
Optional Add-ons for Customization
If you’re ready to expand your skills and explore more detailed designs, consider adding the following upgrades to your DIY screen-printing setup:
-
Lazy Susan for multi-color setups – This rotating base allows for smooth alignment when switching between colors, making multi-color printing a breeze.
-
Photo emulsion and light exposure setups – Perfect for transferring intricate designs, such as detailed artwork or logos, onto your screens.
With these add-ons, your screen-printing machine won’t just be functional; it will be capable of producing advanced, creative designs that stand out.
Tips for Choosing Sustainable Materials
You can build your DIY screen-printing machine while being mindful of the environment. Here are some sustainability tips to implement in your project:
-
Use salvaged wood for frames – Not only does this reduce waste, but it also lowers your costs without compromising frame quality.
-
Opt for water-based inks – These are eco-friendly, safer to use, and deliver vibrant colors without the need for harsh chemicals.
By focusing on sustainable materials, you’re contributing to a cleaner planet and creating a cost-effective way to master how to make a DIY screen-printing machine.
Equipped with these essential tools, optional upgrades, and sustainable choices, you’re well on your way to building a screen-printing machine that empowers creativity and supports your personal or professional goals.
Here are the essential Tools, Optional Add-Ons, and Sustainability Tips for building a DIY Screen-Printing Machine
Step-by-Step Guide to Building a DIY Screen-Printing Machine
If you’ve been wondering how to make a diy screen-printing machine, this guide breaks down everything you need to know about creating your very own setup. Whether you’re just getting started or looking for advanced techniques to expand your craft, these step-by-step methods will help you create machines suited to your needs. From single-color presses to eco-friendly designs, here’s how to bring your vision to life.
1. Single-Color Screen Printing Press
The single-color screen printing press is the best starting point for anyone new to screen printing. It’s simple, compact, and focuses on foundational skills without overwhelming complexity.
Materials Needed
-
Wooden board (flat and smooth surface)
-
Hinge clamps
-
Screws
Steps
-
Cut your wooden board to the desired size. Aim for a smooth, flat surface large enough to securely hold a screen frame.
-
Attach hinge clamps to one edge of the board using screws. Ensure both clamps are aligned perfectly for precise and consistent prints.
-
Test the alignment by inserting a screen frame into the clamps. Adjust it if necessary to avoid any misprints during use.
Advantages and Limitations
Pros:
-
Easy to construct, making it ideal for beginners learning how to make a diy screen-printing machine.
-
Its compact, portable design fits well in small workspaces.
Cons:
-
Limited to a single color, which may not satisfy more advanced creative goals.
Starting with a single-color press provides the perfect foundation for exploring more sophisticated designs and techniques.
2. Wall-Mounted Screen Printing Press
For those who are short on workspace but keen to expand their printing projects, a wall-mounted screen printing press is a fantastic option. It’s a creative step up if you’re learning how to make a diy screen-printing machine with greater functionality.
Materials Needed
-
Flat wooden board
-
Scrap wood or pallets
-
Hinge clamps
-
Screws
Assembly Instructions
-
Build a secure frame using scrap wood or pallets to mount your screen printer onto a sturdy wall.
-
Attach a flat wooden board at an adjustable angle to allow more flexibility when handling larger prints.
-
Install hinge clamps on the board. Align them carefully to ensure smooth operations and consistently flawless prints.
Key Features
-
Space-Saving Design: This frees up valuable desk or table space by mounting the setup on a wall.
-
Larger Projects: The adjustable angle enhances ease-of-use for printing oversized designs, making it possible to tackle bigger projects with confidence.
This setup provides invaluable inspiration if you’re curious about how to make a diy screen-printing machine that’s both adaptable and convenient.
3. Rotary Multi-Color Printing Press
The rotary press is ideal for those who want to advance their craft, offering the ability to create multi-color, professional-level designs. If you're already familiar with how to make a diy screen-printing machine, this is a great project to level up your skills.
Tools and Preparation
-
Lazy Susan turntable
-
Adjustable clamps
-
Springs
-
Lag screws
Steps to Build
-
Secure the Lazy Susan turntable firmly to a base or workstation. The turntable is crucial for smooth and easy rotation between frames.
-
Attach multiple screen frames to the turntable using adjustable clamps. Ensure the clamps are spaced evenly to allow seamless transitions between colors.
-
Add springs to the clamps to facilitate easy lifting between prints, then secure the frames with lag screws. Test rotation and alignment for consistent results.
Why Go Multi-Color?
-
Advanced Designs: Perfect for intricate, multi-colored artwork that stands out on apparel and merchandise.
-
Efficiency: The rotary functionality makes it possible to print faster, boosting productivity for business use or bulk orders.
Experimenting with multi-color presses can also serve as a stepping stone to innovative projects, like how to make a diy screen-printing machine with additional customization options.
4. Bench-Top Portable Printing Station
For those who want a quick, lightweight solution, the bench-top portable station is an excellent choice. This setup prioritizes mobility and efficiency without compromising quality.


![Permanent Magnets Market [New Report] by Updated Development 2033](https://timessquarereporter.com/public/upload/media/posts/2025-04/15/permanent-magnets-market-new-report-by-updated-development-2033_1744709886-s.jpg)

Comments
0 comment