views
Professional Tips for a Successful Vomit Removal in Auto Detailing
Auto detailing can often feel like an art form, especially when dealing with unpleasant messes like vomit. Whether it’s a long road trip or a quick trip to the drive-thru, unexpected incidents can leave your car's interior in need of urgent care. If you’re in the business of car detailing for vomit, or if you simply want to keep your own vehicle in pristine condition, here are some professional tips to effectively tackle vomit removal.
Understanding the Challenge
Vomit can be particularly challenging to clean due to its acidic nature, which can damage upholstery and leave behind lingering odors. The first step in effective auto detailing vomit removal is to assess the situation. Is the vomit primarily on fabric seats, carpeting, or hard surfaces? Each material requires a different approach, so it’s crucial to identify where the mess is before diving in.
Gather Your Tools
Before you start the cleaning process, gather the necessary tools and cleaning supplies. Here’s what you’ll need:
Protective gear: Gloves and a mask to protect yourself from germs and unpleasant odors.
Scraper: A plastic scraper or spatula to gently remove any solid chunks.
Absorbent cloths: Microfiber cloths are ideal for soaking up liquids.
Enzyme cleaner: An enzymatic cleaner specifically designed for organic matter can break down vomit and neutralize odors.
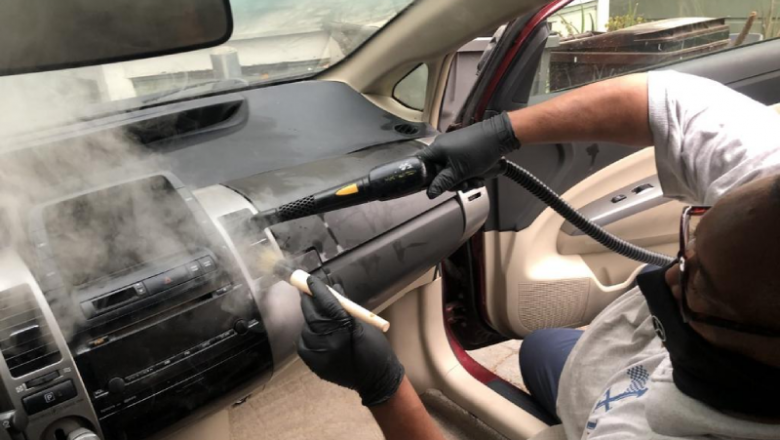
Upholstery cleaner: A good quality upholstery cleaner or a steam cleaner for fabric surfaces.
Baking soda: A natural deodorizer that can help eliminate lingering smells.
Vacuum: A wet/dry vacuum can be incredibly helpful for both suction and deep cleaning.
Step-by-Step Vomit Removal Process
Step 1: Remove Solid Matter
Start by carefully scraping away any solid remnants of vomit. Use your plastic scraper to lift off any chunks without pushing them deeper into the fabric. This initial removal will make the rest of the cleaning process much easier.
Step 2: Blot, Don’t Rub
Using a microfiber cloth, gently blot the affected area to soak up as much liquid as possible. Avoid rubbing, as this can spread the mess further and grind it into the fibers. Keep using fresh sections of the cloth until no more liquid is being absorbed.
Step 3: Apply Enzyme Cleaner
Once you’ve blotted up excess liquid, it’s time to treat the stain. Apply your enzyme cleaner according to the product instructions. Enzymatic cleaners work by breaking down the proteins in organic matter, which helps to eliminate both stains and odors. Allow it to sit for the recommended time to ensure it can work effectively.
Step 4: Rinse and Blot Again
After the enzyme cleaner has had time to sit, take a clean, damp cloth and gently blot the area to remove any residue from the cleaner. Follow up with a dry cloth to absorb as much moisture as possible. If you’re dealing with upholstery, be cautious not to saturate the fabric.
Step 5: Deep Clean with Upholstery Cleaner
If the stain persists, consider using a dedicated upholstery cleaner. Apply it according to the instructions and use a soft brush or cloth to work it into the fabric. Afterward, rinse with a damp cloth and blot dry.
Step 6: Neutralize Odors with Baking Soda
To tackle any lingering odors, sprinkle baking soda over the affected area once it’s dry. Allow the baking soda to sit for several hours or overnight, then vacuum it up. Baking soda is a natural deodorizer and can absorb unpleasant smells effectively.
Step 7: Final Touches
If you’ve done all the above and the smell still lingers, you may want to consider using an ozone generator or an air purifier to neutralize odors. These devices can help eliminate any remaining unpleasant scents that may have settled into the car’s interior.
Prevention Tips:
While accidents happen, there are ways to prevent future incidents from becoming overwhelming:
Use seat covers: Consider investing in removable, washable seat covers to protect upholstery.
Keep cleaning supplies handy: Having a small cleaning kit in your trunk can help you address messes on the go.
Encourage passengers to take breaks: For long trips, plan regular stops to minimize the chances of motion sickness.
Conclusion
Car detailing for vomit may not be the most glamorous aspect of auto detailing, but it’s an essential skill that can save your vehicle from lasting damage and unpleasant odors. By following these professional tips for auto-detailing vomit removal, you’ll be well-equipped to handle any mess that comes your way. Remember, the key is to act quickly and use the right tools for the job. With a little effort and the right approach, your car can return to its pristine condition in no time.


Comments
0 comment