
Yet staging for photography is different from staging for an open house: the camera’s field of view, focal length, and lighting exaggerate some flaws while minimizing others. Whether you’re a homeowner preparing to list, a real‑estate agent supervising the process, or a professional stager fine‑tuning the final look, the following comprehensive guide will help you create images that stop the scroll and spark that crucial emotional connection.
1. Start With Buyer Profiling
Before moving a single sofa, clarify who is likely to purchase the property. Families with young children care about safe outdoor spaces and storage; millennials may favor flexible live‑work nooks; luxury buyers expect spa‑level bathrooms and gourmet kitchens. A clear profile dictates what to highlight, what to tone down, and how to style accessories so every frame whispers, “This home is built for you.”
2. Declutter, Depersonalize, and Deliberately Edit
Clutter shrinks rooms in photographs. Remove countertop appliances, extra chairs, and stacks of mail. Pack personal photos, trophies, and niche collections that distract viewers from imagining their own lives in the space. When in doubt, pull an item out—an edited room feels larger, calmer, and more aspirational.
3. Deep Clean for High‑Definition Lenses
Modern cameras capture every speck of dust and fingerprint on stainless‑steel appliances. Schedule a professional deep clean the day before the shoot: polish faucets to a mirror shine, scrub grout lines until they are a uniform color, and wash windows until they disappear. Touch up wall scuffs and baseboards with matching paint. A pristine backdrop lets textures, finishes, and architectural details pop instead of grime.
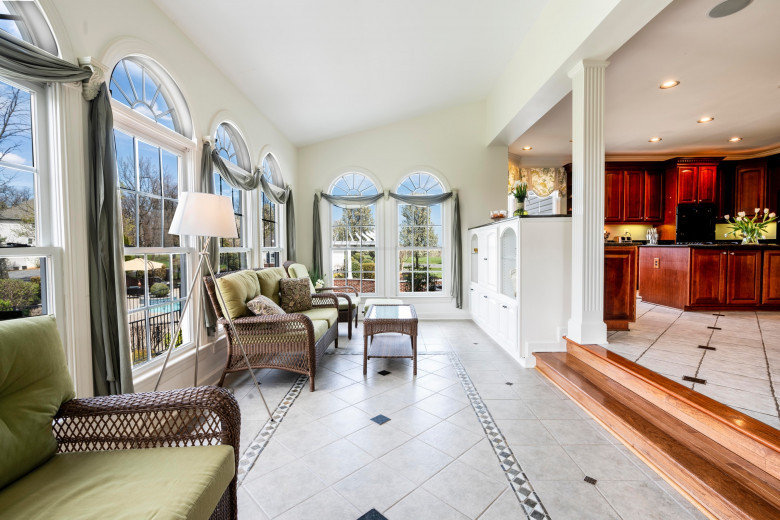
4. Optimize Furniture Layout for Flow and Sight Lines
A camera sees only what’s in front of it. Shift large pieces away from walls to create breathing space, then angle chairs and sofas to guide the eye toward focal points such as a fireplace or picture window. Align coffee tables and rugs so the edges parallel the camera frame—crooked geometry feels uneasy on screen. Remove bulky or redundant items (that second armchair, the too‑tall plant) to widen walking paths and convey generous square footage.
5. Create Killer Curb Appeal
First impressions begin at the thumbnail preview. Power‑wash sidewalks, repaint the front door, and replace dated house numbers with crisp modern fonts. Fresh mulch and simple green landscaping read better on camera than complex planting beds. Hide trash bins, hoses, and lawn tools out of sight. If twilight photography is planned, swap dim porch bulbs for brighter warm‑white LEDs and test all exterior lighting the evening before.
6. Let There Be (Balanced) Light
Light sells a listing. Open every curtain and blind to invite daylight, but check for harsh beams that create blown‑out highlights. Sheer drapes or a bounce reflector can soften midday sun. Switch on all interior fixtures—even table lamps in adjacent rooms—because balanced ambient light eliminates dark hallways that otherwise become ominous black rectangles in photos. Replace cool‑blue bulbs with warm 2700–3000 K lamps for welcoming color temperature consistency.
7. Use Color and Texture Strategically
Neutrals provide a blank canvas, but pops of color draw the eye and build memorable identity. Limit vibrant hues to removable accents—throw pillows, artwork, a sculptural vase—clustered in threes or fives for cohesion. In bedrooms, crisp white bedding topped with a textured throw suggests luxury hotel comfort. In the kitchen, a single bowl of bright lemons on a white quartz island reads clean, fresh, and photogenic.
8. Highlight Unique Architectural Features
If the home boasts vaulted ceilings, exposed beams, or a reclaimed‑wood accent wall, stage to emphasize those differentiators. Angle furniture away from feature walls, clear clutter around statement staircases, and spotlight built‑in shelving with carefully edited décor. In photos, these details communicate craftsmanship and justify premium pricing.
9. Accessorize Like a Magazine Stylist
Small objects set an upscale tone. Group décor by theme or color, vary height for visual rhythm, and leave negative space so each item can breathe. A coffee table vignette might include a hardcover design book, a candle, and a small succulent. In the bathroom, roll fluffy white towels and place a glass jar of bath salts next to a teak tray. Avoid overt branding and political or religious messages; universal aspirational cues resonate best online.
10. Tackle Small Spaces and Tricky Corners
Pantries, closets, and utility rooms often get overlooked, yet buyers love organized storage. Use matching baskets and clear bins to line shelves, face all labels forward, and leave empty gaps to suggest abundant capacity. In long narrow hallways, hang a single large statement art piece instead of multiple small frames to avoid visual noise.
11. Prepare Outdoor Living Areas
Backyards in Southern California can be just as valuable as interior footage. Stage a conversation set around a firepit, arrange fresh cushions on patio furniture, and set a pitcher of iced tea on the dining table. Mow the lawn in alternating diagonal stripes for a manicured look. If a pool is present, skim debris, stow cleaning equipment, and add rolled towels in a basket to evoke resort vibes.
12. Coordinate With the Photographer Early
Professional shooters often provide a prep checklist—follow it. Ask which rooms they plan to capture, the order of the shoot, and ideal lighting conditions. If employing a pro who specializes in Orange County real estate photography, they may recommend specific twilight shots that capture the beachy evening glow unique to the region. Knowing their lens choice and preferred angles helps you move furniture or art in advance, reducing day‑of stress.
13. Construct a Day‑Of Shoot Checklist
-
Turn on all lights, including closets and under‑cabinet strips
-
Open interior doors at 90 degrees for a welcoming, spacious feel
-
Tuck away cords, remotes, and pet bowls
-
Fluff pillows, smooth duvet covers, and align chair backs
-
Place fresh flowers (no overly fragrant lilies) in the foyer and kitchen
-
Set thermostats to a comfortable temperature to prevent window fogging
Run through each item room by room, then walk the property with your phone camera to preview potential issues before the photographer arrives.
14. Maintain “Show‑Ready” Mode Afterward
Beautiful listing photos set expectations for in‑person tours. Keep beds made daily, counters clear, and lawn care on schedule. Store a laundry basket in the garage so you can sweep last‑minute clutter inside before unexpected showings. Replenish fresh flowers and launder towels regularly. Consistency between photos and reality builds trust with buyers and agents alike.
15. Final Thoughts: Staging as a High‑ROI Marketing Tool
Effective staging is less about buying trendy décor and more about curating light, space, and emotion so the camera captures a compelling story. By profiling the buyer, editing possessions with a ruthless eye, cleaning to photographic standards, and accentuating architectural strengths, you transform mere rooms into a lifestyle dream that buyers feel compelled to pursue. Staging is an investment, but compared to price reductions and extended days on market, it delivers outsized returns—often adding thousands of dollars to the sale price while reducing selling time.
Thoughtful preparation doesn’t just polish a property; it elevates the marketing narrative behind it. Harness these tips, collaborate closely with your photographer, and your listing’s first impression will shine as brightly online as it does in person, proving once again the persuasive power of skillful, camera‑ready presentation in the world of Orange County real estate photography.


Comments
0 comment