Automatic Garbage Collector Project for students, project features a silent garbage collector robot using RFID for door detection, triggering the house buzzer and LED. It navigates with IR sensors along a path to collect garbage, powered by Arduino and a 4-wheel motor drive
Automatic Garbage Collector project is about making a quiet robot that collects garbage. It uses a special card near the door to know when to come inside. When it arrives, it makes a buzzer sound and flashes a light. The robot follows a dark path using sensors, going from door to door to pick up garbage. It’s all controlled by an Arduino and a motor driver to move smoothly and quietly around homes, Automatic Garbage Collector Project for students
Components Required:
- Arduino Board: 1
- RFID Module (e.g., MFRC522): 1
- RFID Card: 1
- Motor Driver Module (e.g., L298N): 1
- DC Motors: 2
- IR Sensors: 2
- Buzzer: 1
- LED: 1
- I2C LCD Module (e.g., 16×2): 1
Connections:
- RFID Module (MFRC522):
- SDA: Connect to digital pin 10 (SS_PIN)
- SCK: Connect to digital pin 13 (SPI SCK)
- MOSI: Connect to digital pin 11 (SPI MOSI)
- MISO: Connect to digital pin 12 (SPI MISO)
- RST: Connect to digital pin 9 (RST_PIN)
- 3.3V: Connect to 3.3V pin on Arduino
- GND: Connect to GND pin on Arduino
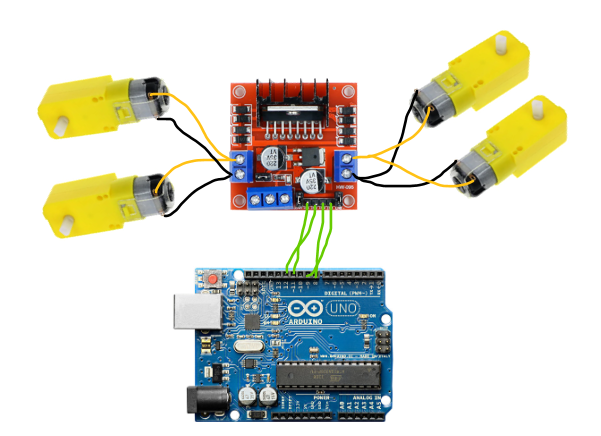
- Motor Driver Module (e.g., L298N):
- Motor 1 Control:
- Input 1 (IN1): Connect to digital pin 2 (motor1A)
- Input 2 (IN2): Connect to digital pin 3 (motor1B)
- Motor 2 Control:
- Input 3 (IN3): Connect to digital pin 4 (motor2A)
- Input 4 (IN4): Connect to digital pin 5 (motor2B)
- VCC: Connect to external power supply positive (e.g., 12V)
- GND: Connect to external power supply negative and Arduino GND
- Motor 1 Control:
- IR Sensors:
- Left IR Sensor: Connect analog output to analog pin A0 (leftIRSens)
- Right IR Sensor: Connect analog output to analog pin A1 (rightIRSens)
- VCC: Connect to 5V pin on Arduino
- GND: Connect to GND pin on Arduino
- Buzzer and LED:
- Buzzer: Connect positive pin to digital pin 6 (buzzerPin), negative to GND
- LED: Connect positive pin to digital pin 7 (ledPin), negative to GND
- I2C Communication:
- SDA: Connect to analog pin A4 (SDA)
- SCL: Connect to analog pin A5 (SCL)
- VCC: Connect to 5V pin on Arduino
- GND: Connect to GND pin on Arduino
- Mini Breadboard