
Digitizing for embroidery is a specialized technique that converts digital designs into embroidery machine-readable files. This process is key to ensuring that intricate designs and logos are stitched accurately and beautifully on various fabrics. Whether you’re a beginner or an experienced embroidery professional, understanding the ins and outs of digitizing can elevate the quality of your work and streamline your workflow. In this guide, we will explore the process of digitizing for embroidery, essential tools, common pitfalls to avoid, and best practices to help you create flawless embroidered designs.
What is Digitizing for Embroidery?
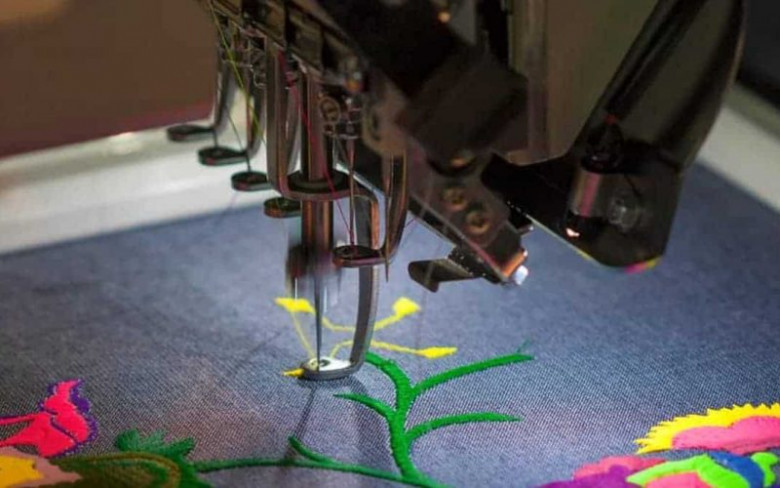
Digitizing for embroidery is the conversion of digital artwork into a format that an embroidery machine can understand and replicate. It’s a process that involves turning a graphic design—such as a logo, image, or illustration—into a set of instructions, including stitch types, directions, and densities. This ensures that your design can be accurately recreated on fabric with the embroidery machine. Without digitizing, embroidery machines wouldn’t be able to know how to sew a design onto the fabric. The process requires specialized software to transform the design and prepare it for stitching.
Why is Digitizing Essential for Embroidery?
- Precision: Proper digitization ensures your design is stitched with precision, preserving important details, text, and complex shapes. Without correct digitizing, designs can appear distorted or lose their finer details.
-
Efficient Production: A well-digitized design reduces the chances of thread breaks, misalignment, or stitching errors. This makes the embroidery process smoother and faster, helping businesses save time and reduce waste.
-
Fabric Compatibility: Each type of fabric reacts differently to stitches. Digitizing for embroidery allows you to adjust the design's stitch settings, such as density and sequence, to best suit the fabric you are working with. Whether it’s delicate silk or heavy denim, the right digitizing ensures a flawless result.
-
Brand Consistency: For businesses, digitizing ensures that your brand’s logo or design looks the same every time. Consistent digitization leads to uniformity across all embroidered items, from apparel to promotional products.
Step-by-Step Guide to Digitizing for Embroidery
-
Prepare the Artwork: The first step in digitizing is selecting the right artwork. Ensure that your image is of high resolution and in a clean format. If your design is a raster image (e.g., JPG or PNG), convert it to a vector file format like SVG or EPS. Vector images are ideal for digitizing because they can be resized without losing clarity.
-
Import the Design into Embroidery Software: Once your design is in vector format, import it into embroidery software. Popular digitizing software programs include Wilcom, Hatch, and CorelDRAW. These tools provide the necessary features to convert your artwork into a stitch file.
-
Assign Stitch Types: Different elements of your design will require different types of stitches. There are several common stitch types to choose from:
- Satin Stitches: These are ideal for outlines, letters, and narrow shapes.
- Fill Stitches: Best for larger areas that need to be filled with texture or color.
- Running Stitches: Perfect for simple lines or borders.
-
Set Stitch Density and Sequence: Stitch density refers to how closely the stitches are placed. A higher density creates a fuller, more solid design, while a lower density gives a lighter, airier effect. The stitch sequence determines the order in which the embroidery machine will apply the stitches. Optimizing both density and sequence is crucial for efficient stitching.
-
Test the Design: Before starting a large batch of embroidery, always test your design on a sample fabric. This test run will help you identify potential issues such as poor stitch quality, alignment problems, or the need for density adjustments.
-
Finalize and Export the File: Once you’re satisfied with the test result, finalize the design and export it in a format compatible with your embroidery machine (e.g., DST, PES, EXP). This file can now be loaded into the machine to begin the embroidery process.
Essential Tools for Digitizing Embroidery
-
Embroidery Software: Digitizing for embroidery requires specialized software. Popular options include Wilcom, TruEmbroidery, and Hatch. These programs are designed to help users convert artwork into stitch files while providing advanced tools for editing and optimization.
-
Graphics Tablet: A graphics tablet allows for greater control and precision when editing designs. It’s particularly helpful for users who want to manually adjust intricate details.
-
Embroidery Machine: The final step involves stitching the design. Make sure your embroidery machine is compatible with the file format you’ve exported and can handle the design efficiently.
Common Mistakes to Avoid in Digitizing for Embroidery
-
Incorrect Stitch Density: Choosing the wrong stitch density can cause the fabric to pucker or the design to appear too dense or too sparse. Always adjust the stitch density based on the fabric and the size of the design.
-
Not Testing Your Design: Testing your design is crucial to ensure it looks good on fabric. Failing to do so can result in costly mistakes and wasted materials. Always run a test stitch before committing to a full production run.
-
Overcomplicating the Design: Complex designs with too many details can be difficult to digitize accurately. If a design has too many tiny elements or intricate details, it may not translate well to embroidery. Keep designs simple to avoid potential problems.
-
Ignoring Fabric Characteristics: Different fabrics require different approaches when it comes to stitching. For example, stretchy fabrics require lower stitch densities, while thicker fabrics might need more stitches. Always digitize your designs with the fabric type in mind.
-
Skipping the Stitch Sequence Optimization: The order in which stitches are applied can significantly affect the final result. Ensure your stitch sequence is optimized to prevent unnecessary thread breaks or machine stops.
Conclusion
Digitizing for embroidery is a critical skill for anyone involved in the embroidery business or hobby. By understanding the process, tools, and best practices, you can create high-quality, accurate, and visually stunning embroidery designs that will impress your clients or enhance your personal projects. With the right knowledge and patience, mastering digitizing will significantly improve the quality and consistency of your embroidery work.
Frequently Asked Questions (FAQs) About Digitizing for Embroidery
1. What file formats are best for embroidery?
Common file formats for embroidery include:
- DST: A widely used format for commercial machines.
- PES: Popular for Brother and Babylock machines.
- EXP: Common for industrial embroidery machines.
2. Can I digitize my own designs?
Yes! With the right software and practice, you can digitize your own designs. While there is a learning curve, many beginners start with simple logos or text before moving on to more intricate designs.
3. How long does it take to digitize a design?
The time required depends on the complexity of the design. A simple design may take 30 minutes to an hour, while more complex designs could take several hours.
4. How do I fix common digitizing errors?
If you encounter issues such as thread breaks or misalignment, it’s essential to check your stitch density, test stitch sequences, and ensure your fabric settings are correct. Running multiple test stitches can help you spot and correct issues before production.
5. Can I use photographs for embroidery?
Yes, photographs can be digitized, but they often need to be simplified. Photographs may contain too much detail for embroidery machines to replicate accurately, so reducing the design to basic shapes and colors is essential.


Comments
0 comment