views
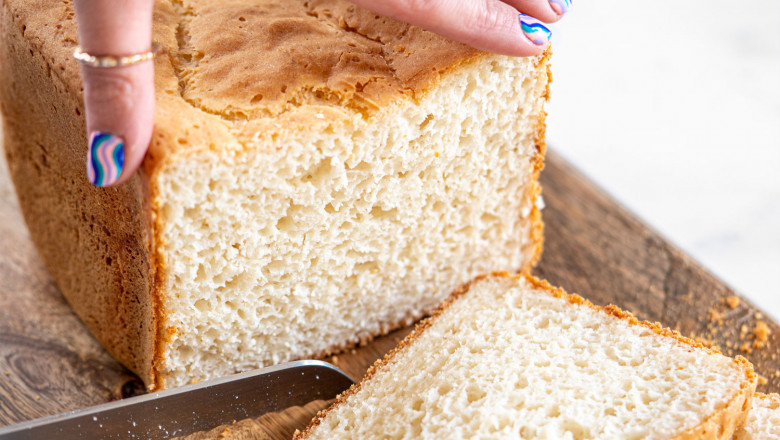
Bread flour is a flexible ingredient that professional bakers and home bakers alike love and it’s no surprise why! This type of flour can make airy, chewy and well-structured loaves. What makes this ideal for bread, unlike other flours, this has a higher protein content that contributes to its unique texture and structure.
But of course, for new bakers, this can be intimidating especially if you’ve never worked with bread flour before but that’s completely understandable. So if you have bread flour at home and don’t know what to do with it, well keep reading!
In this article, we’ll be helping you make use of that bread flour! Below are awesome tips on how to work with this flour type!
1 - Understanding its Protein Content
As mentioned above, what makes this flour different from the other types is its protein content. All-purpose flour contains around 8-11% of protein, while bread flour, on the other hand, contains around 11-14%.
The higher the protein content; creates more gluten when mixed with water. This is what will give your bread its structure and chewy texture. So when working with this flour, you can expect its dough to be stronger and more elastic.
Apart from bread, bread flour is also great for pizza crust recipes, artisan breads and sandwich loaves.
Pro Tip: If you happen to have a recipe that calls for all-purpose flour, BUT you want it to have a chewier texture, substitute it with bread flour. Note, that working with a recipe that calls for all-purpose flour and substituting it with bread flour will call for water measurement adjustments.
2 - Pay Close Attention to Hydration Levels
Since you’re dealing with a higher protein content flour, you have to remember this will require more water. Bread flour absorbs more water compared to lower-protein flour. So if you notice, recipes that require bread flour always account for this.
Well-hydrated dough is easier to knead and it yields better results in terms of texture and crumbs.
Pro Tip: When adding in your water, add it gradually. This is to prevent overhydrating your dough. You can start with about 90% of the recommended amount and adjust as you mix.
3 - Mixing and Kneading Tips
Dealing with higher gluten means your dough will typically be more stretchy, smooth and a bit gummy–this means it will take a little more time and energy to knead. When working with bread flour, you should come up with techniques when mixing and kneading.
Pro Tip: You can whip out your stand mixer with a dough hook to help you out with the kneading. This is especially ideal when you’re mixing dough with higher hydration. Kneading this by hand will get you working on that dough for around 8-10 minutes until it passes the “windowpane test.”
Windowpane test: This is the method used in bread making. This checks the development of gluten in the dough. This is done by pinching off a small amount of dough and then stretching it. If the dough stretches thin enough to form a translucent "windowpane" without tearing, the gluten is well-developed.
But if it tears easily or doesn’t quite stretch to form a thin sheet, it either needs more kneading or rest time.
4 - Know When It’s Time to Rest the Dough
Any dough benefits from resting periods; this is called autolyse and bulk fermentation. What resting does is, it helps the gluten relax and lets the flour fully hydrate. This makes the dough easier to work with and also improves the bread’s final texture.
Pro Tip: To get better results from flavour to structure, allow your dough to rest in the fridge overnight. This will allow cold fermentation which slows down the yeast activity, enhancing the bread’s taste and texture.
5 - The Art of Shaping
One thing you’ll love about using bread flour is how easy it is to shape due to its elasticity and strength. But, overhandling it can cause the dough to tear or deflate. So what you can do is, be gentle but firm. When shaping your dough, whether it's into a loaf or roll, remember to be gentle and firm!
Pro Tip: You can flour your hands lightly, as well as the surface to prevent sticking. Make sure you’re not adding in too much flour which can result in a more dense bread.
6 - Learn to be Flexible with Different Recipes
Bread flour isn’t just for bread! Yes, its properties do make it ideal for bread making, but this flour can also be used in different recipes! Examples are pasta dough, cookies, cakes, muffins and so much more!
However, you can opt for a different type of flour when baking delicate baked goods, ideally ones with low-protein content.
Pro Tip: If you want to use bread flour for non-yeasted recipes, you can consider adding in some all-purpose flour to reduce the bread flour’s protein content.
Take Away
Bread flour is a great ingredient to have in your kitchens since this can be used in various ways. Don’t let its protein content intimidate you can start working with this flour type! Who knows you might like it compared to other flour types.


Comments
0 comment