
A strong, reliable roof is one of the most essential parts of your home. Whether you’re dealing with storm damage, an aging roof, or planning a major home improvement project, understanding the roofing installation process can save you time, money, and stress.
This guide will walk you through each step of a typical roofing installation—from preparing your home to the final inspection—so you know exactly what to expect. Whether you're hiring a roofing contractor or just want to understand what goes into it, we’ll make it straightforward.
Let’s get started.
Why Roofing Installation Matters
A new roof is more than just shingles. It’s your home’s first line of defense against the elements—sun, rain, snow, and wind. Done right, it can boost your home’s curb appeal, increase energy efficiency, and even improve resale value.
But roofing isn't just about aesthetics or function. It’s also about safety. A poorly installed roof can lead to leaks, mold growth, or even structural damage.
That's why it’s so important to understand the process, ask the right questions, and work with professionals who care about every detail—from the first nail to the final cleanup.
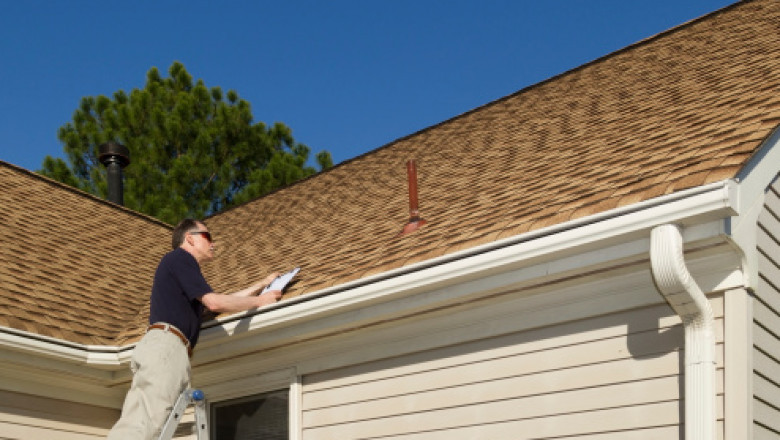
Step 1: Roof Inspection and Evaluation
Before anything else, a professional roofing contractor will inspect your existing roof. This includes looking for:
-
Missing or broken shingles
-
Signs of water damage or leaks
-
Rotting wood or structural issues
-
Sagging or soft spots
-
Chimney condition and flashing integrity
This inspection helps determine whether a full roof replacement is necessary or if a few repairs will suffice. If you have a chimney, this is also the right time to bring in a Chimney Care Service to evaluate its condition. Roofing and chimney work often go hand-in-hand, especially when it comes to flashing and leak prevention.
Step 2: Choosing Roofing Materials
After the inspection, it’s time to select the right materials for your new roof. Common roofing options include:
-
Asphalt shingles – Budget-friendly and popular in most neighborhoods
-
Metal roofing – Durable and energy-efficient
-
Clay or concrete tiles – Ideal for hot climates
-
Slate roofing – Elegant and long-lasting
-
Wood shakes – Great for rustic aesthetics
Factors that influence your decision may include your budget, local climate, and the style of your home. Your contractor will help you choose what works best for your needs.
Step 3: Scheduling and Permits
Once materials are selected, your contractor will schedule the installation. Depending on your location, permits may be required for roofing work. A reliable contractor will handle all the paperwork for you.
Weather plays a big role in scheduling. Roofing during dry, mild weather is best. If rain is expected, the project may need to be delayed to protect your home from water exposure.
Step 4: Removing the Old Roof
On the first day of installation, the roofing team will start by removing your old roof. This includes:
-
Stripping off old shingles
-
Removing underlayment
-
Inspecting the decking beneath
All this debris will be collected and properly disposed of. A good crew will place tarps around your property to catch falling debris and protect landscaping.
If the decking (the wooden base layer of your roof) is damaged or rotten, it will be replaced before moving forward.
Step 5: Repairs and Structural Preparation
Once the old materials are removed, the roof deck is inspected closely. If your roof has valleys, edges, or areas around the chimney, this is where special attention is needed. Flashing around chimneys, skylights, and vents is often replaced to prevent future leaks.
Chimney Care Service experts may be brought in to ensure your chimney is structurally sound and properly sealed before new roofing is installed. This collaborative effort helps ensure long-term durability and safety.
Step 6: Installing Underlayment and Flashing
After repairs, the roofing team will install a water-resistant or waterproof underlayment (typically synthetic) to protect your roof’s decking from water intrusion.
This layer helps prevent leaks from wind-driven rain or snow. Flashing (metal strips that prevent water from seeping in at joints) is also installed around chimneys, skylights, and vents.
Proper flashing and underlayment installation is crucial—cutting corners here can lead to long-term problems.
Step 7: Shingle or Roofing Material Installation
With the underlayment and flashing in place, the main event begins: installing the new roofing material.
Roofers typically start at the bottom edge and work their way up. Shingles or roofing panels are nailed or fastened down following the manufacturer’s guidelines and local building codes.
This part of the process usually takes one to three days depending on:
-
Roof size
-
Weather
-
Number of layers
-
Crew size
Step 8: Ridge Vents and Final Touches
Once the roofing material is installed, roofers will add ridge vents or other forms of attic ventilation. Proper ventilation is key to preventing moisture buildup and prolonging the life of your roof.
If your roof includes a chimney, the flashing is double-checked, and any sealing is finalized. If needed, a Chimney Care Service provider can install a new chimney cap, repoint bricks, or repair the crown—all important for long-term performance.
Final touches also include painting or replacing trim, securing gutters, and inspecting seals around any roof penetrations.
Step 9: Cleanup
A responsible roofing crew will thoroughly clean the area after installation. This includes:
-
Removing leftover shingles and packaging
-
Using magnets to pick up nails
-
Hauling away debris
-
Checking landscaping for damage
Your property should look as clean (or cleaner) than before the job started.
Step 10: Final Inspection and Walkthrough
Finally, your contractor will perform a full inspection and walk you through the finished work. They’ll explain:
-
What was done
-
What materials were used
-
How to maintain your new roof
-
Warranty details
If your chimney was involved, make sure you also receive a report from your Chimney Care Service provider.
This final walkthrough gives you peace of mind that your roof was installed correctly and is ready to protect your home for years to come.
Bonus Tips for a Smooth Roofing Installation
-
Ask for references: Choose a contractor with good reviews and a solid reputation.
-
Understand your warranty: Know the difference between manufacturer and workmanship warranties.
-
Plan for noise: Roofing is loud. Let your neighbors and household members know what to expect.
-
Protect belongings: Cover valuables in the attic to prevent dust or debris.
-
Coordinate chimney work: It’s easier to address chimney repairs during roofing than after.
How Roofing and Chimney Services Work Together
Many homeowners overlook the connection between their roof and chimney. But the truth is, roofing and chimney systems are closely linked.
During roofing installation, flashing is placed around the base of the chimney to prevent leaks. If your chimney is cracked, leaning, or the mortar is deteriorating, it could compromise the integrity of your new roof.
That’s why it’s smart to involve a professional Chimney Care Service during your roofing project. Services may include:
-
Chimney inspections
-
Masonry repair
-
Cap installation
-
Waterproofing
By addressing both systems together, you’ll save money and reduce the need for future repairs.
FAQs
1. How long does a roof installation take?
A typical roof installation takes between 1 to 3 days. However, larger homes, bad weather, or additional repairs can extend the timeline.
2. Do I need to leave my house during the roofing process?
No, but it will be noisy. If you work from home or have pets or young children, you may want to make alternative arrangements during work hours.
3. Can I install a new roof over my old one?
In some cases, yes. However, it’s usually better to remove the old roof to inspect the decking and install proper underlayment and flashing.
Final Thoughts
Installing a new roof is a major investment—but one that pays off in long-term comfort, energy savings, and home value. When done correctly and in coordination with services like Chimney Care Service, you can be confident your home is protected from top to bottom.
Whether you’re planning for the future or tackling a current roofing issue, use this guide as your roadmap. Understanding the roofing installation process puts you in control and helps you make informed decisions every step of the way.


Comments
0 comment