
Ultimate Guide to Digitizer for Embroidery
Embroidery has transitioned from a traditional craft to a highly advanced digital art form. A digitizer for embroidery plays a key role in this evolution, converting images into machine-readable stitch patterns. Whether you’re a business owner, hobbyist, or professional embroiderer, understanding embroidery digitizing will help you achieve better results. In this guide, we’ll explore how embroidery digitizing works, its benefits, and how to choose the right tools for the job.
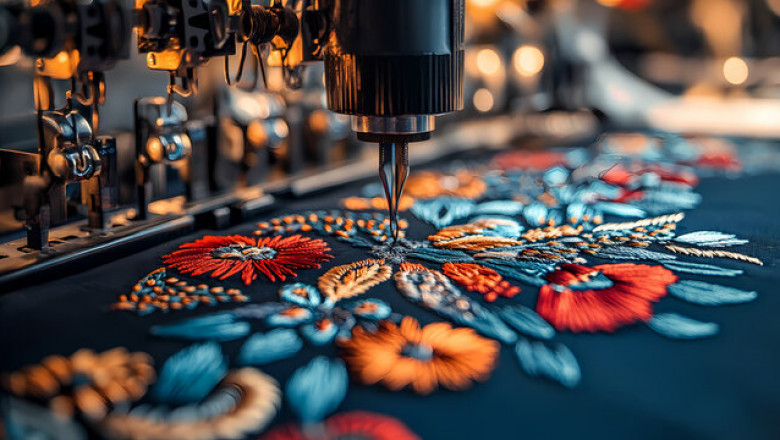
What is a Digitizer for Embroidery?
A digitizer for embroidery refers to both the software and the professional responsible for converting digital images into stitch files. Unlike simple image conversion, embroidery digitizing requires assigning stitch types, directions, and densities to ensure the design is accurately embroidered on fabric.
Why You Need a Digitizer for Embroidery
Using a digitizer for embroidery enhances the quality and efficiency of your embroidery projects in multiple ways:
-
High Precision – Digitized designs ensure perfect stitch placement for clean and professional results.
-
Customization – A digitizer for embroidery allows you to create unique, personalized patterns.
-
Efficiency – Digitized files streamline the embroidery process, reducing errors and saving time.
-
Consistent Quality – Reproduce designs multiple times with the same high-quality outcome.
How a Digitizer for Embroidery Works
The embroidery digitizing process involves a series of critical steps:
-
Choosing the Design – Select the image or artwork you want to digitize.
-
Using Digitizing Software – A digitizer for embroidery processes the image and converts it into machine-readable instructions.
-
Assigning Stitch Types – Various stitches like satin, fill, or running stitches are applied based on design complexity.
-
Setting Stitch Density and Direction – These factors impact durability and the overall appearance of the embroidery.
-
Testing the Design – A sample run ensures the embroidery looks as expected before full production.
Selecting the Best Digitizer for Embroidery
When choosing a digitizer for embroidery, consider these key factors:
-
Skill Level – If hiring a digitizing professional, check their experience and past work.
-
Software Features – Popular software like Wilcom, Hatch, and Brother PE-Design offer powerful tools for high-quality digitizing.
-
File Format Support – Ensure the software or digitizer supports formats like DST, PES, EXP, and JEF.
-
Ease of Learning – For beginners, choose software with good tutorials and support.
-
Budget Considerations – While premium software and services may be costly, they offer advanced features and better precision.
Conclusion
A digitizer for embroidery is an essential tool for anyone looking to create high-quality embroidered designs. Whether you opt for professional digitizing services or use embroidery digitizing software, understanding the process will help you achieve better results. With the right digitizer for embroidery, you can take your embroidery projects to a whole new level.
Frequently Asked Questions (FAQs)
Q1: Can I digitize embroidery designs on my own?
Yes, with the right digitizing software and practice, you can create your own embroidery designs.
Q2: What is the best embroidery digitizing software?
Top choices include Wilcom, Hatch, Brother PE-Design, and Embird, catering to different expertise levels.
Q3: How long does it take to digitize an embroidery design?
The time required varies depending on design complexity, typically ranging from a few minutes to several hours.
Q4: What are the most common embroidery file formats?
Standard formats include DST, PES, EXP, JEF, and VP3, depending on the embroidery machine brand.
Q5: Can any image be converted into an embroidery design?
Most images can be digitized, but complex designs may need modifications to enhance stitch quality and clarity.


Comments
0 comment