
Have you ever spent hours on 3D prints with only layers, right edges, or total failure? You are not alone—and the problem often starts long before your printer starts. It begins with your design, file format, and software settings. If your silhouette is unclear or misplaced on your model, stop blaming the printer. It's time to review your workflow.
This guide engages in the process of completely printing the silhouette design-Step-from, where you get high-quality files to dial into printer settings like a pro. Knowing the whole picture will help you save time, filament and headache, whether you are an experienced user or a newcomer.
Let's start where it matters the most: with the quality of your files. Starting with clean, compatible, and well-structured 3D printable designs sets you up for a smooth ride through every other process phase. Here is how to do it properly from the beginning.
Step 1: Get a Trustworthy Source of 3D Silhouette Designs
Your initial step is everything. The quality of the starting design determines your entire success. Whether you're designing decor, custom packaging, educational models, or customized pieces, low-grade files will undermine your outcomes.
Most important in selecting a design:
- The file should be highly optimized for 3D printing (not converted 2D visuals turned 3D)
- It has to be free of mesh bugs or non-manifold edges
- Select the proper format like STL and OBJ work best for 3D prints
- Be cautious of over-detailed files; high poly counts tend to clog slicers and overwork your printer
The Silhouette Design Store is the most helpful place to find trusty silhouette-style 3D models. This website has thousands of beautifully designed print files optimized for print, from plain geometric cuts to complex silhouette sculptures. It's simple for beginners and even searchable by category, artist, or theme, so finding the correct one for your project is a cinch.
Step 2: Verify Compatibility with Your 3D Printing Software
Once you've got your design downloaded, it's time to transfer it into your slicer. This is where compatibility matters. Every printer has different firmware, and every slicer has a different way of interpreting files. A great design will still fail if your software can't handle it.
Here's what to double-check before slicing:
- File format: Most slicers prefer STL, OBJ, or 3MF formats
- Size: Make sure the model fits within your printer's build volume
- Orientation: Silhouettes tend to be frail; proper orientation avoids overuse of support
- Scale: The 3D printable designs should be appropriately scaled to suit their desired use
For beginners, highly popular 3d Printing Software such as Cura, PrusaSlicer, or Simplify3D lets you preview your print and make those all-important tweaks before you print. The platforms also allow you to change everything from temperature to retraction distance, meaning you have mastery over how your design extrudes.
Step 3: Tweak Your Slicer Settings
Slicing is where your digital silhouette design becomes physical. An efficiently sliced model prints cleanly and uniformly. Silhouette prints have quirks, especially when printing with long, narrow shapes or intricate outlines.
Here's what to remember:
- Layer height: Use a lower height (0.1mm–0.15mm) for high detail
- Wall thickness: Min. 2 perimeters to offer strength
- Infill density: 15% to 50% is enough for silhouettes
- Supports: Use only if necessary; don't use them on flat silhouettes
- Print speed: Faster is not better here; aim for 40–50mm/s
If your print features fine lines or overhanging details, try enabling options such as "Z-hop" or "coasting" to prevent stringing and enhance edge detail. These are easily forgotten but very important to silhouettes.
Recommended Slicer Settings for Silhouette Models
Step 4: Pick the Right Filament and Bed Adhesion Technique
The material type may alter the shape of your silhouette print. PLA is the best for beginners since it is well-taunted and low-risk. Petg is best suited for prints that ought to be hard.
Consider the following while selecting a filament:
- Colour: Darker and light colours are the best suited for silhouettes.
- Size: Select brands referred to as ± 0.02 mm for size.
- Finish: Matt PLA conceals more layer lines than shiny varieties.
For improved adhesion, use:
- A hotbed (ideal temperature: 60 ° C for PLA).
- Glue stick, painter tape, or PEI sheet.
- A fleet or brim may prevent war, particularly on the larger silhouette.
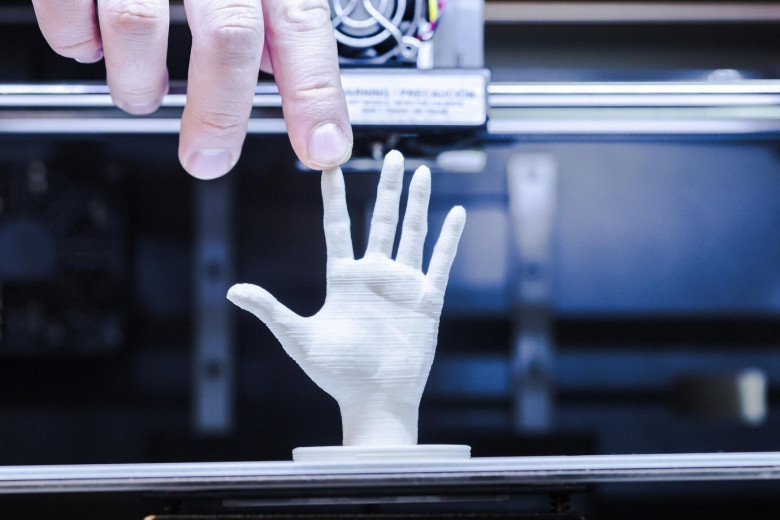
Step 5: Print a Test
Print a small test before you print the whole model. Even a miniature one will indicate how your model behaves in your location.
Look out for:
- War or Curling.
- Uneven boycott
- Is incomplete support
- Ghost on the outline
Retesting this test lets you have the parameters without wasting the filament or print time.
Step 6: Post-processing
Once your silhouette has been printed, it is time to clean or use it.
Post-processing methods:
- Take off supports: Cut off supports with care so you don't break thin edges.
- Sanding: Use fine sandpaper to smooth the surface.
- Priming and painting: Use a primer to help the paint stick.
- Sealing: Use a matte or shiny sealant to keep the final piece safe.
With silhouettes, minimal post-processing is often best—focus on minor fixes, not significant changes.
Bonus: Common Mistakes to Avoid in Silhouette 3D Printing
Even experienced users make avoidable errors. Let's save you the headache by highlighting a few common issues:
- Skipping bed leveling: This can cause warping or pieces to come off.
- Missing file errors: Broken parts or intersecting faces that can ruin prints.
- Too many supports: This adds clean-up time and can hurt thin silhouettes.
- Wrong Scaling: Results in under-detailed or over-extended models
- Ignoring the space: Windy rooms or bumpy surfaces can cause inconsistent prints.
Explore and Experiment with Different 3D Designs
When you learn silhouette printing, try new ideas. You can move to other prints like text designs, shadow boxes, or cool logo models. 3D printing has great possibilities, and silhouette work can be an excellent training ground.
Many creators eventually shift from simple silhouettes to bold 3D designs with moving parts, complex supports, and mixed materials. Every silhouette you print builds skills that work for all 3D printing.
Reusing and Remixing Silhouette Designs for New Projects
One of the best things about using silhouette designs in 3D printing is their flexibility. After you print a model that works, there's no need to shelve the idea—you can repurpose and remix it into many new forms with a few simple adjustments.
Here are some ways to use your silhouette models again:
- Layered Wall Art: Boost your home decor by mixing shapes and sizes. Use layering techniques to create unique motifs that turn into stunning wall art.
- Small Silhouettes for Accessories: Resize smaller silhouettes into fun keychains, cool charms, and unique magnets. These designs are suitable for both gifts and personal use.
- 3D Prints from Flat Silhouettes: Try new techniques to add depth to your designs. For example, apply multiple layers to flat silhouettes to create 3D prints.
- Symmetrical Decor with Mirrored Designs: Make balanced decor that stands out. Use existing shapes and layer them with their mirror image or symmetrical versions. This technique is perfect for wall and table decorations.
- Personalized Silhouettes: You can add names or initials to silhouette designs for a unique touch. Meaningful gifts that can be shared with loved ones and friends.
With a few easy changes in your slicer or design software, one silhouette model can become the start of many new projects. This method boosts your creative skills, cuts costs for new designs, and saves you time.
Plus, this remixing way fits right with the vast options at sites like the Silhouette Design Store, where you can mix different files or styles into fresh print ideas.
Final Thoughts: Make Every Silhouette Print a Success
Getting good results in 3D silhouette printing is not just about luck—it is about preparation. When you start with a clear, top-quality design, match it with the right tools, adjust your settings with care, and use the best materials for the task, your odds of getting it right the first time go way up.
Keep this in mind:
- Always test before you start a big print
- Pick designs made for 3D printing
- Put quality first, not quantity
The Silhouette Design Store is a great help here—it has a large, well-picked set of ready-to-print models that save you the fuss of finding good files. While you can find designs in many places, few focus on making them work well for silhouette-style prints as this site does.
Whether you are making home decor, school models, or detailed displays, the draw of silhouettes is their ease, and your skill in making them right.


Comments
0 comment